> ## Documentation Index
> Fetch the complete documentation index at: https://docs.layercode.com/llms.txt
> Use this file to discover all available pages before exploring further.

# Get started with Next.js (frontend)

> Build web voice agent experiences in Next.js with the Layercode React SDK.

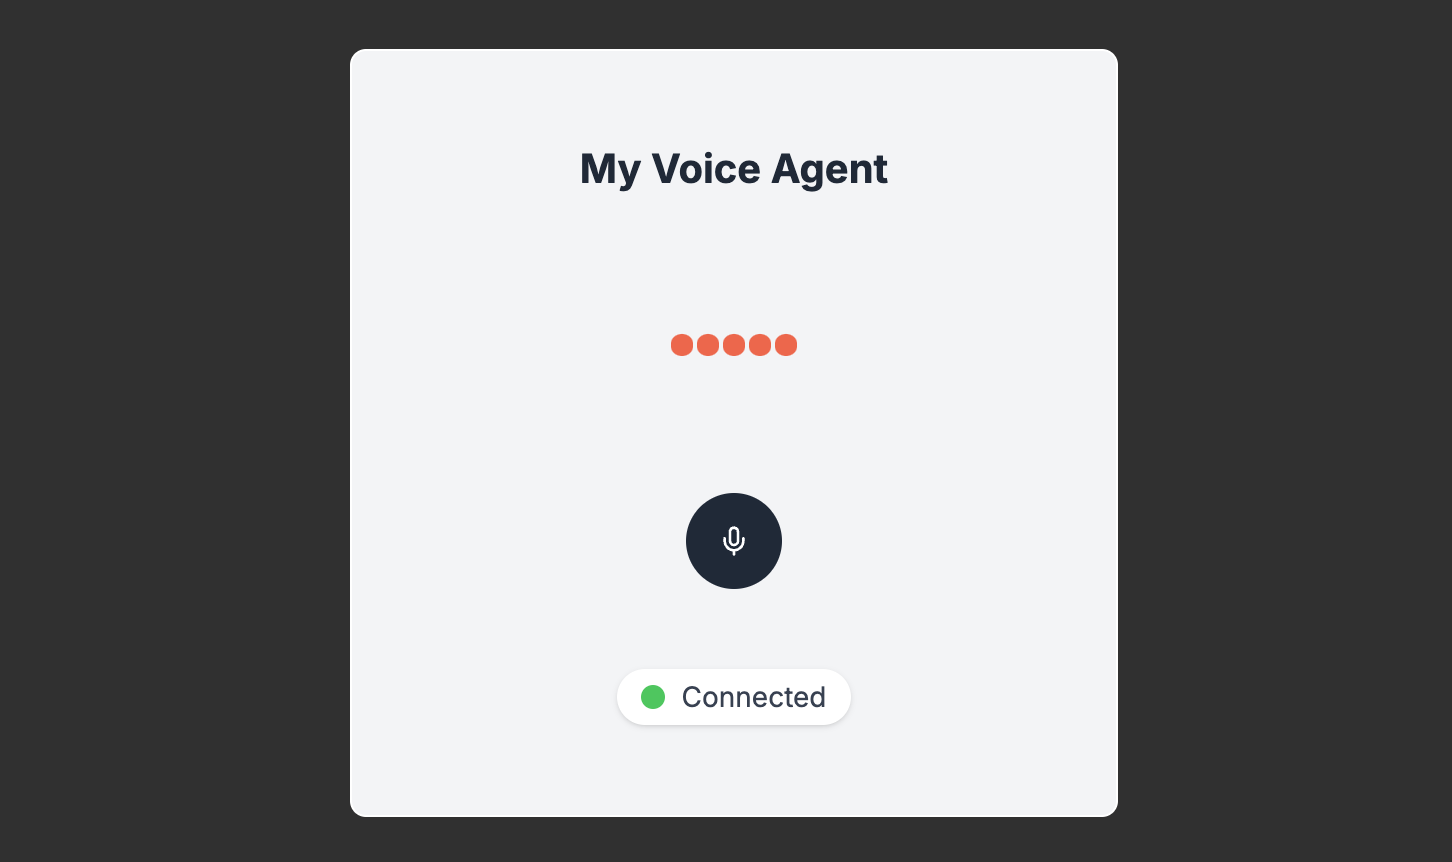
<img className="mx-auto mb-8" src="https://mintcdn.com/layercode/9oeDU9cufqK-WC8r/images/example-voice-agent-ui.png?fit=max&auto=format&n=9oeDU9cufqK-WC8r&q=85&s=b757e31a8e3de40c018095c3c8f7fe18" alt="Example voice agent UI" width="1452" height="862" data-path="images/example-voice-agent-ui.png" />

Layercode makes it easy to build web-based voice agent applications in Next.js. In this guide we'll walk you through a full-stack Next.js example voice agent, that lets users speak to a voice AI in their browser.

**Example code:** <Icon icon="github" size={18} color="black" /> [layercodedev/example-fullstack-nextjs](https://github.com/layercodedev/example-fullstack-nextjs)

<Note>
  This frontend example is part of a full-stack example that also includes a web voice agent React frontend. We recommend reading the [Next.js backend
  guide](/tutorials/next-js-backend) to get the most out of this example.
</Note>

## Setup

To get started, you'll need a Layercode account and a voice agent you've created. If you haven't done so yet, follow our [Getting Started Guide](/tutorials/getting-started).

Then follow the setup instructions in the repo [README file](https://github.com/layercodedev/example-fullstack-nextjs?tab=readme-ov-file#getting-started).

<Warning>
  **Disable React Strict Mode for Development**: React Strict Mode renders components twice in development, which causes the Layercode voice agent hook to initialize twice. This results in duplicate voice agent sessions and can cause issues like hearing the voice agent speak twice.

  To disable React Strict Mode, remove or set `reactStrictMode: false` in your `next.config.js`:

  ```javascript next.config.js theme={null}
  /** @type {import('next').NextConfig} */
  const nextConfig = {
    reactStrictMode: false, // Disable for Layercode development
  }

  module.exports = nextConfig
  ```
</Warning>

## How it works

### Connect to a Layercode voice agent

We use the [React SDK](/sdk-reference/react-sdk) `useLayercodeAgent` hook which handles all the complexity required for real-time, low-latency, two-way voice agent interactions.

Here's a simplified example of how to use the React SDK in a Next.js application:

<CodeGroup>
  ```tsx app/ui/VoiceAgent.tsx theme={null}
  import { useLayercodeAgent } from '@layercode/react-sdk';
  import { MicrophoneIcon } from '../icons/MicrophoneIcon';

  export default function VoiceAgent() {
    const { agentAudioAmplitude, status } = useLayercodeAgent({
      agentId: process.env.NEXT_PUBLIC_LAYERCODE_AGENT_ID,
      authorizeSessionEndpoint: '/api/authorize',
    });

  return (

  <div className="h-12 px-4 rounded-full flex items-center gap-2 justify-center select-none bg-black">
    <MicrophoneIcon />
  </div>
  ); }

  ```

  ```tsx app/page.tsx theme={null}
  'use client';
  import VoiceAgent from './ui/VoiceAgent';

  export default function Home() {
    return (
      <div className="w-full min-h-[80vh] flex items-center justify-center">
        <VoiceAgent />
      </div>
    );
  }
  ```
</CodeGroup>

**The useLayercodeAgent hook accepts the following parameters:**

* Your agent ID, found in the [Layercode Dashboard](https://dash.layercode.com)
* The endpoint to authorize the client session (see [Authorize Client Session](#authorizing-sessions))
* An optional callback function for handling data messages (not shown in example above)

**On mount, the useLayercodeAgent hook will:**

1. Make a request to your authorize session endpoint to create new session and return the client session key. Here you can also do any user authorization checks you need for your app.
2. Establish a WebSocket connection to Layercode (using the client session key)
3. Capture microphone audio from the user and stream it to the Layercode voice agent for transcription
4. (At this stage, Layercode will call [your Backend](/explanations/connect-backend) webhook to generate a response, and then convert the response from text to speech)
5. Playback audio of the voice agent's response to the user in their browser, as it's generated

**The useLayercodeAgent hook returns an object with the following properties:**

* `status`: The connection status of the voice agent. You can show this to the user to indicate the connection status.
* `agentAudioAmplitude`: The amplitude of the audio from the voice agent. You can use this to drive an animation when the voice agent is speaking.

By default, your voice agent will handle turn taking in automatic mode. But you can configure your voice agent to use push to talk mode. If you are using push to talk mode see the [push-to-talk instructions in the repo README](https://github.com/layercodedev/example-fullstack-nextjs?tab=readme-ov-file#push-to-talk-mode) and read about [how the VoiceAgentPushToTalk component](#voiceagentpushtotalk-optional) works below.

## Authorizing Sessions

To connect a client (browser) to your Layercode voice agent, you must first authorize the session. The SDK will automatically send a POST request to the path (or url if your backend is on a different domain) passed in the `authorizeSessionEndpoint` option. In this endpoint, you will need to call the Layercode REST API to generate a `client_session_key` and `conversation_id` (if it's a new conversation).

<Info>If your backend is on a different domain, set `authorizeSessionEndpoint` to the full URL (e.g., `https://your-backend.com/api/authorize`).</Info>

**Why is this required?**
Your Layercode API key should never be exposed to the frontend. Instead, your backend acts as a secure proxy: it receives the frontend's request, then calls the Layercode authorization API using your secret API key, and finally returns the `client_session_key` to the frontend.

This also allows you to authenticate your user, and set any additional metadata that you want passed to your backend webhook.

**How it works:**

1. **Frontend:**
   The SDK automatically sends a POST request to your `authorizeSessionEndpoint` with a request body.

2. **Your Backend:**
   Your backend receives this request, then makes a POST request to the Layercode REST API `/v1/agents/web/authorize_session` endpoint, including your `LAYERCODE_API_KEY` as a Bearer token in the headers.

3. **Layercode:**
   Layercode responds with a `client_session_key` (and a `conversation_id`), which your backend returns to the frontend.

4. **Frontend:**
   The SDK uses the `client_session_key` to establish a secure WebSocket connection to Layercode.

**Example backend authorization endpoint code:**

<CodeGroup>
  ```ts Next.js app/api/authorize/route.ts [expandable] theme={null}
  export const dynamic = "force-dynamic";
  import { NextResponse } from "next/server";

  export const POST = async (request: Request) => {
    // Here you could do any user authorization checks you need for your app
    const endpoint = "https://api.layercode.com/v1/agents/web/authorize_session";
    const apiKey = process.env.LAYERCODE_API_KEY;
    if (!apiKey) {
      throw new Error("LAYERCODE_API_KEY is not set.");
    }
    const requestBody = await request.json();
    if (!requestBody || !requestBody.agent_id) {
      throw new Error("Missing agent_id in request body.");
    }
    try {
      const response = await fetch(endpoint, {
        method: "POST",
        headers: {
          "Content-Type": "application/json",
          Authorization: `Bearer ${apiKey}`,
        },
        body: JSON.stringify(requestBody),
      });
      if (!response.ok) {
        const text = await response.text();
        throw new Error(text || response.statusText);
      }
      return NextResponse.json(await response.json());
    } catch (error: any) {
      console.log("Layercode authorize session response error:", error.message);
      return NextResponse.json({ error: error.message }, { status: 500 });
    }
  };
  ```

  ```ts Hono theme={null}
  import { Context } from 'hono';
  import { env } from 'cloudflare:workers';

  export const onRequestPost = async (c: Context) => {
    try {
      const response = await fetch("https://api.layercode.com/v1/agents/web/authorize_session", {
        method: 'POST',
        headers: {
          'Content-Type': 'application/json',
          Authorization: `Bearer ${env.LAYERCODE_API_KEY}`,
        },
        body: JSON.stringify({ agent_id: "your-agent-id", conversation_id: null }),
      });
      if (!response.ok) {
        console.log('response not ok', response.statusText);
        return c.json({ error: response.statusText });
      }
      const data: { client_session_key: string; conversation_id: string; config?: Record<string, any> } = await response.json();
      return c.json(data);
    } catch (error) {
      return c.json({ error: error });
    }
  };
  ```

  ```ts ExpressJS theme={null}
  import type { RequestHandler } from 'express';

  export const onRequestPost: RequestHandler = async (req, res) => {
    try {
      const response = await fetch("https://api.layercode.com/v1/agents/web/authorize_session", {
        method: 'POST',
        headers: {
          'Content-Type': 'application/json',
          Authorization: `Bearer ${process.env.LAYERCODE_API_KEY}`,
        },
        body: JSON.stringify({ agent_id: "your-agent-id", conversation_id: null }),
      });
      if (!response.ok) {
        console.log('response not ok', response.statusText);
        return res.status(500).json({ error: response.statusText });
      }
      const data: { client_session_key: string; conversation_id: string; config?: Record<string, any> } = await response.json();
      res.json(data);
    } catch (error) {
      res.status(500).json({ error: (error as Error).message });
    }
  };
  ```

  ```python Python theme={null}
  import os
  import httpx
  from fastapi.responses import JSONResponse


  @app.post("/authorize")
  async def authorize_endpoint(request: Request):
      api_key = os.getenv("LAYERCODE_API_KEY")
      if not api_key:
          return JSONResponse({"error": "LAYERCODE_API_KEY is not set."}, status_code=500)
      try:
          body = await request.json()
      except Exception:
          return JSONResponse({"error": "Invalid JSON body."}, status_code=400)
      if not body or not body.get("agent_id"):
          return JSONResponse({"error": "Missing agent_id in request body."}, status_code=400)
      endpoint = "https://api.layercode.com/v1/agents/web/authorize_session"
      try:
          async with httpx.AsyncClient() as client:
              response = await client.post(
                  endpoint,
                  headers={
                      "Content-Type": "application/json",
                      "Authorization": f"Bearer {api_key}",
                  },
                  json=body,
              )
          if response.status_code != 200:
              return JSONResponse({"error": response.text}, status_code=500)
          return JSONResponse(response.json())
      except Exception as error:
          print("Layercode authorize session response error:", str(error))
          return JSONResponse({"error": str(error)}, status_code=500)
  ```
</CodeGroup>

## Components

### AudioVisualization

The `AudioVisualization` component is used to visualize the audio from the voice agent. It uses the `agentAudioAmplitude` value returned from the useLayercodeAgent hook to drive the height of the audio bars with a simple animation.

```tsx app/ui/AudioVisualization.tsx [expandable] theme={null}
export function AudioVisualization({ amplitude, height = 46 }: { amplitude: number; height?: number }) {
  // Calculate the height of each bar based on amplitude
  const maxHeight = height;
  const minHeight = Math.floor(height / 6);
  const barWidth = Math.floor(minHeight);

  // Create multipliers for each bar to make middle bars taller
  const multipliers = [0.2, 0.5, 1.0, 0.5, 0.2];

  // Boost amplitude by 7 and ensure it's between 0 and 1
  const normalizedAmplitude = Math.min(Math.max(amplitude * 7, 0), 1);

  return (
    <div className="w-auto flex items-center gap-[2px]" style={{ height: `${height}px` }}>
      {multipliers.map((multiplier, index) => {
        const barHeight = minHeight + normalizedAmplitude * maxHeight * multiplier;

        return (
          <div
            key={index}
            className="flex flex-col items-center"
            style={{
              height: `${barHeight}px`,
              width: `${barWidth}px`,
            }}
          >
            {/* Top rounded cap */}
            <div
              className="bg-[#FF5B41] dark:bg-[#FF7B61] transition-all duration-20"
              style={{
                width: "100%",
                height: `${barWidth}px`,
                borderTopLeftRadius: "9999px",
                borderTopRightRadius: "9999px",
              }}
            />
            {/* Middle straight section */}
            <div
              className="bg-[#FF5B41] dark:bg-[#FF7B61] transition-all duration-20"
              style={{
                width: "100%",
                height: `calc(100% - ${2 * barWidth}px)`,
                borderRadius: 0,
              }}
            />
            {/* Bottom rounded cap */}
            <div
              className="bg-[#FF5B41] dark:bg-[#FF7B61] transition-all duration-20"
              style={{
                width: "100%",
                height: `${barWidth}px`,
                borderBottomLeftRadius: "9999px",
                borderBottomRightRadius: "9999px",
              }}
            />
          </div>
        );
      })}
    </div>
  );
}
```

### ConnectionStatusIndicator

The `ConnectionStatusIndicator` component is used to display the connection status of the voice agent. It uses the `status` value returned from the useLayercodeAgent hook to display the connection status.

```tsx app/ui/ConnectionStatusIndicator.tsx [expandable] theme={null}
export function ConnectionStatusIndicator({ status }: { status: string }) {
  return (
    <div className="justify-self-start flex items-center gap-2 bg-white dark:bg-gray-800 sm:px-3 p-1 rounded-full shadow-sm dark:shadow-gray-900/30">
      <div className={`w-3 h-3 rounded-full ${status === "connected" ? "bg-green-500" : status === "connecting" ? "bg-yellow-500" : "bg-red-500"}`} />
      <span className="text-sm text-gray-700 dark:text-gray-300 hidden sm:block">
        {status === "connected" ? "Connected" : status === "connecting" ? "Connecting..." : status === "error" ? "Connection Error" : "Disconnected"}
      </span>
    </div>
  );
}
```

### VoiceAgentPushToTalk (optional)

Because the useLayercodeAgent hook handles all of the audio streaming and playback, in most cases the microphone button is simply a visual aid and doesn't implement any logic. A simple microphone icon inside a circle will suffice in most cases.

Layercode does support 'push-to-talk' turn taking, as an alternative to automatic turn taking (read more about [turn taking](/explanations/turn-taking)). When using 'push-to-talk' turn taking, holding down and releasing the `MicrophoneButton` must send a WebSocket message to tell Layercode the user has started and finished talking. In this example, we provide an alternative `VoiceAgentPushToTalk` component, that along with the `MicrophoneButtonPushToTalk` component, handles this logic.

To use this mode, you'll need to edit `app/page.tsx` to use the `VoiceAgentPushToTalk` component instead of the `VoiceAgent` component. Then in your Layercode Dashboard, you'll need to click Edit in the Transcription section of your voice agent and set the Turn Taking to Push to Talk.

<CodeGroup>
  ```tsx app/ui/VoiceAgentPushToTalk.tsx [expandable] theme={null}
  import { useLayercodeAgent } from '@layercode/react-sdk';
  import { AudioVisualization } from './AudioVisualization';
  import { ConnectionStatusIndicator } from './ConnectionStatusIndicator';
  import { MicrophoneButtonPushToTalk } from './MicrophoneButtonPushToTalk';

  export default function VoiceAgentPushToTalk() {
    const { agentAudioAmplitude, status, triggerUserTurnStarted, triggerUserTurnFinished } = useLayercodeAgent({
      agentId: process.env.NEXT_PUBLIC_LAYERCODE_AGENT_ID!,
      authorizeSessionEndpoint: '/api/authorize',
      onDataMessage: (data) => {
        console.log('Received data msg', data);
      },
    });

  return (

  <div className="w-96 h-96 border border-white rounded-lg flex flex-col gap-20 items-center justify-center">
    <h1 className="text-gray-800 text-xl font-bold">Voice Agent Demo</h1>
    <AudioVisualization amplitude={agentAudioAmplitude} height={75} />
    <div className="flex flex-col gap-4 items-center justify-center">
      <MicrophoneButtonPushToTalk triggerUserTurnStarted={triggerUserTurnStarted} triggerUserTurnFinished={triggerUserTurnFinished} />
      <ConnectionStatusIndicator status={status} />
    </div>
  </div>
  ); }

  ```

  ```tsx app/ui/MicrophoneButtonPushToTalk.tsx [expandable] theme={null}
  import { useButtonHold } from '../hooks/useButtonHold';
  import { MicrophoneIcon } from '../icons/MicrophoneIcon';
  export function MicrophoneButtonPushToTalk({ triggerUserTurnStarted, triggerUserTurnFinished }: { triggerUserTurnStarted: () => void; triggerUserTurnFinished: () => void }) {
    // When using push-to-talk turn taking in your Layercode voice agent, you'll need to call triggerUserTurnStarted and triggerUserTurnFinished when the user holds down the microphone button or spacebar.
    // The useButtonHold hook handles this state, and also include debouncing so that short accidental clicks are ignored.
    const { isVisuallyPressed, handlePressStart, handlePressEnd } = useButtonHold({
      onPressStart: triggerUserTurnStarted,
      onPressEnd: triggerUserTurnFinished,
      key: 'Space',
    });

    return (
      <button
        className={`h-12 px-4 rounded-full flex items-center gap-2 justify-center cursor-pointer outline-none focus:outline-none transition-colors duration-200 select-none ${
          isVisuallyPressed ? 'bg-[#FF5B41]' : 'bg-gray-800 dark:bg-gray-700 hover:bg-black dark:hover:bg-gray-800'
        }`}
        onMouseDown={handlePressStart}
        onMouseUp={handlePressEnd}
        onMouseLeave={handlePressEnd}
        onTouchStart={handlePressStart}
        onTouchEnd={handlePressEnd}
      >
        <div className="text-sm font-medium text-white whitespace-nowrap">Hold while speaking</div>
        <MicrophoneIcon />
      </button>
    );
  }
  ```
</CodeGroup>