- push your changes to a remote repo (i.e. GitHub/GitLab).
- Sign up at Vercel, Click Add New project
- Then import your Git Respository
- Paste in your environmental variables from
.env - Deploy
- Take that url (e.g. https://fullstack-nextjs-vercel-five.vercel.app/) of your backend and save it into the Layercode agent backend settings under webhook url (append the appropriate path for your API e.g. https://fullstack-nextjs-vercel-five.vercel.app/api/agent)
Troubleshooting authentication issues
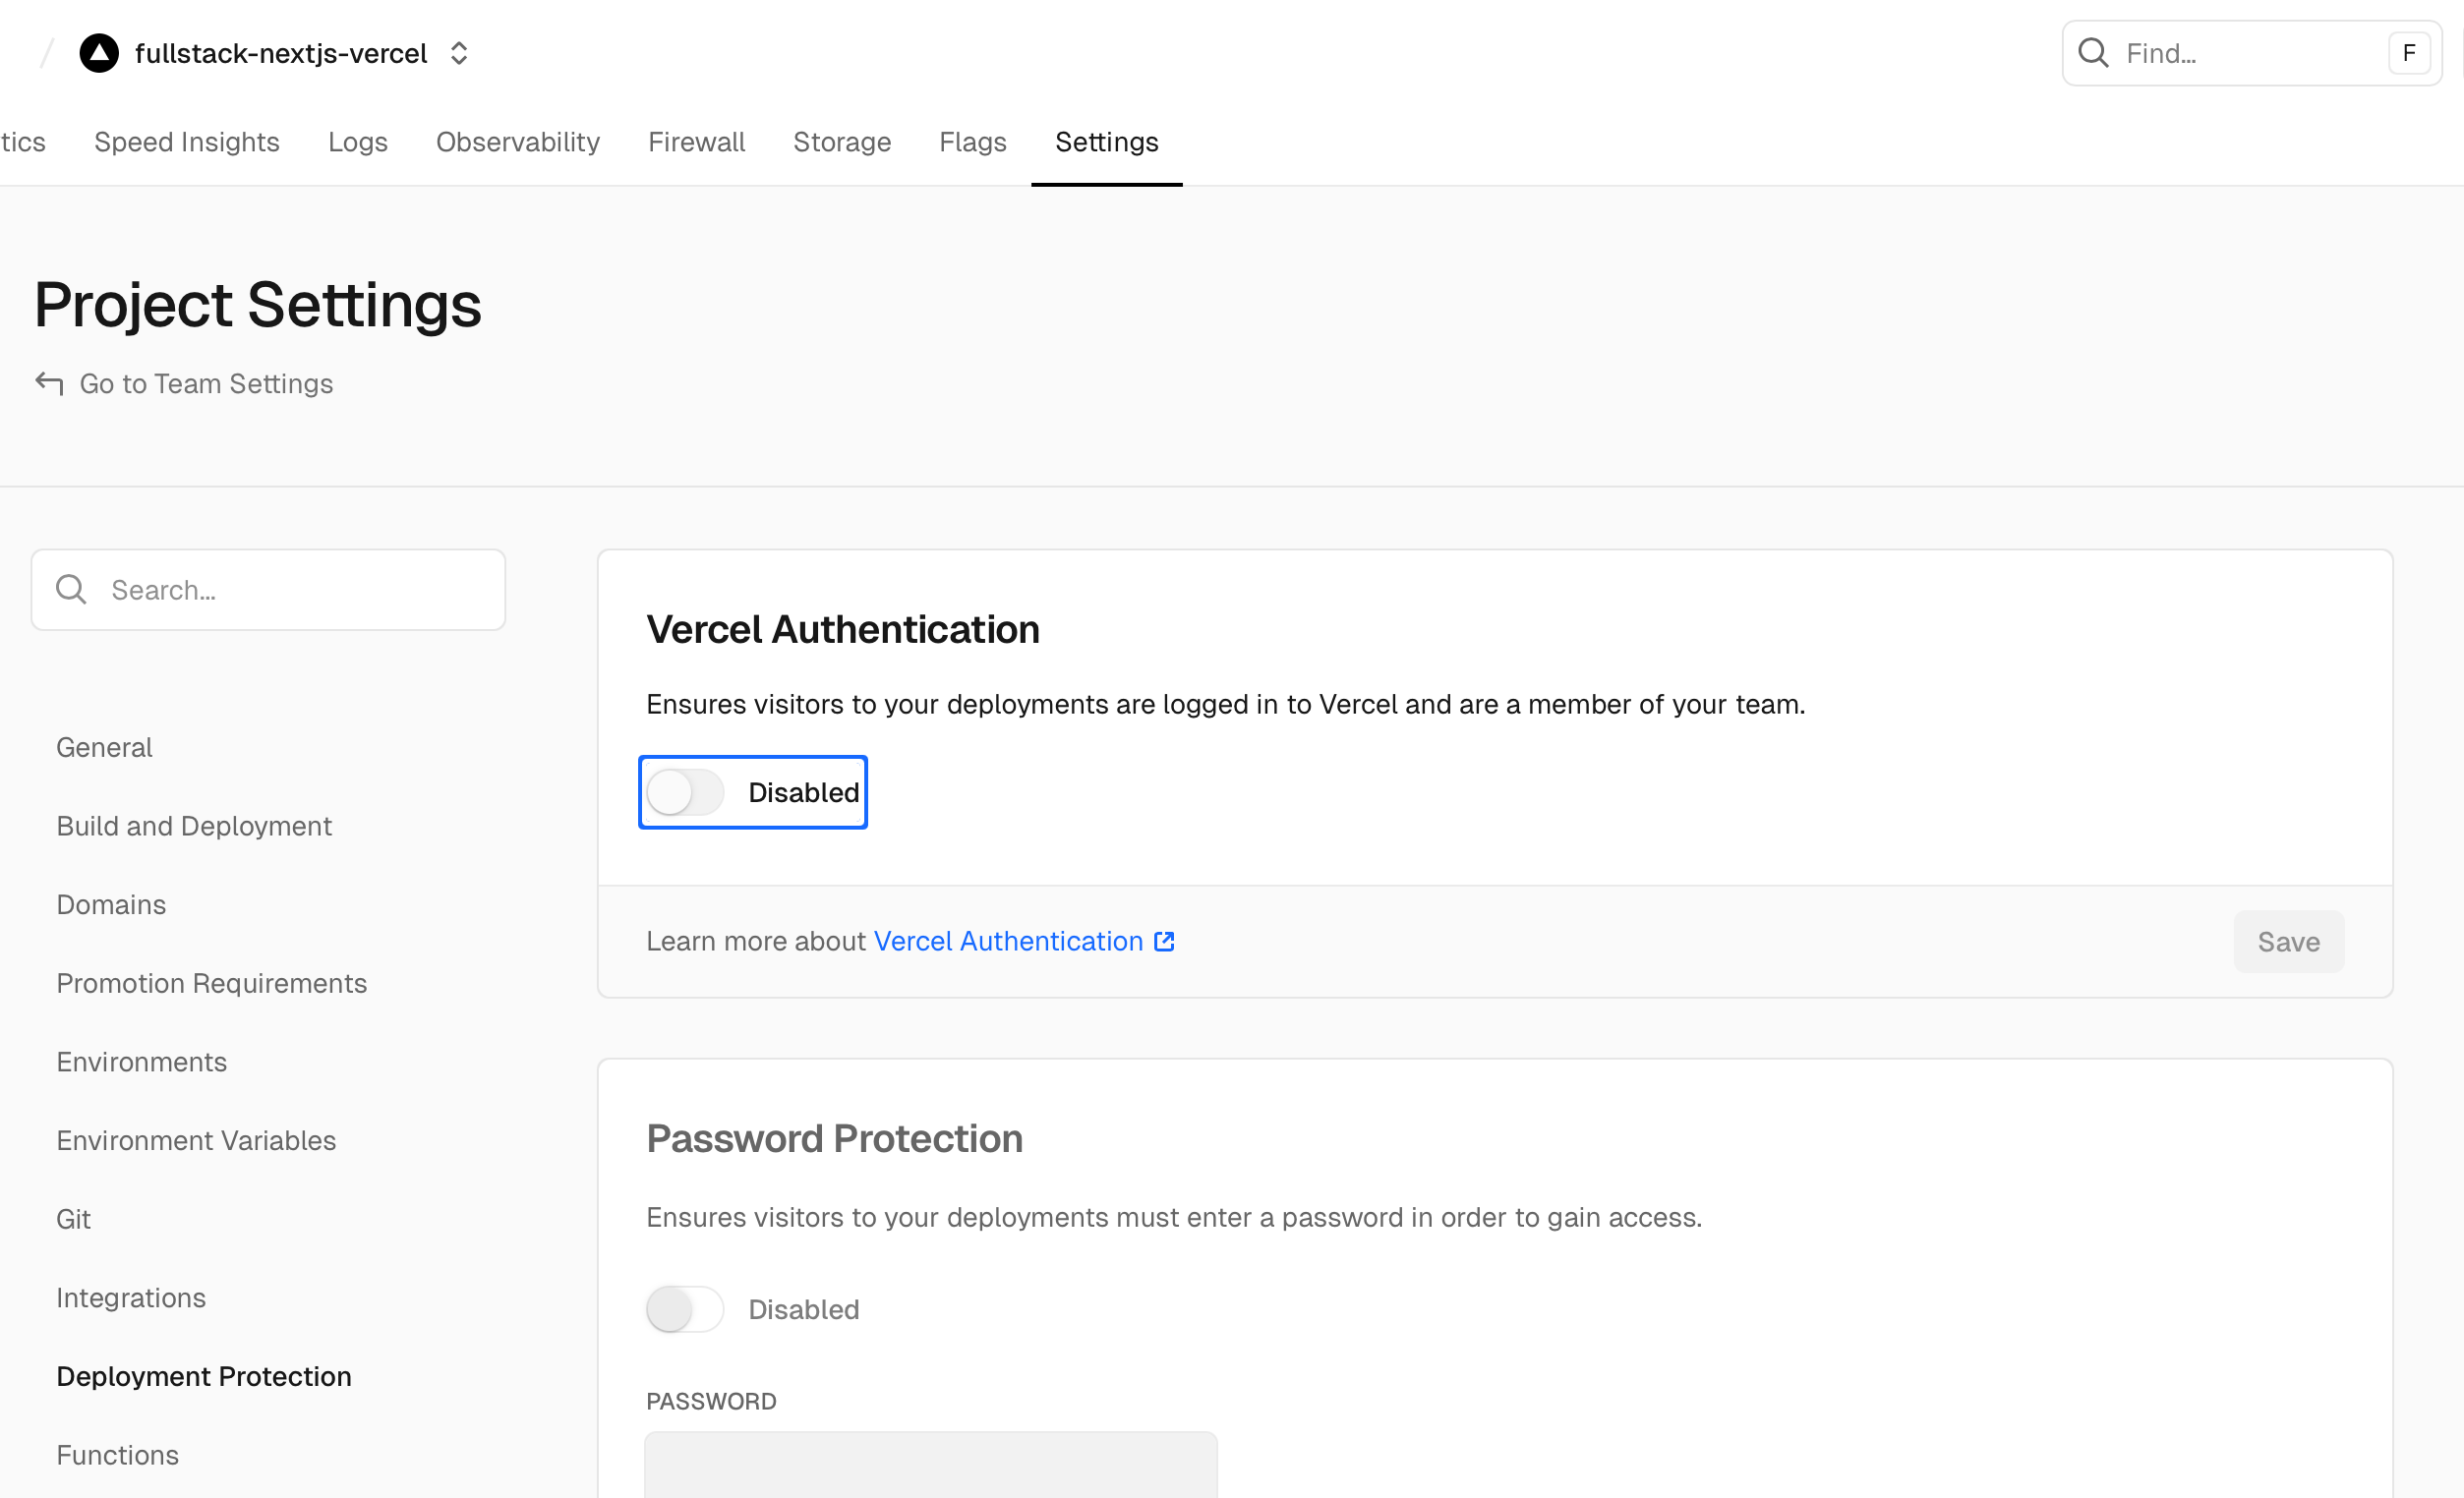
When deploying to Vercel, you MUST disable Vercel Authentication to allow Layercode webhooks to be received. By default for pro plans, Vercel blocks external requests to your application /api routes. This means that Layercode webhooks will not be received by your application, and your voice agent will not work. Disable Vercel Authentication by going to your project settings in the Vercel dashboard, then go to “Deployment Protection” in left sidebar menu, then turn off “Vercel Authentication” and Save. You do not need to redeploy. You can check your Webhook Logs in the Layercode dashboard to ensure that webhooks are being received successfully. If you receive a 405 error response to webhooks, this indicates that Vercel Authentication is still enabled. Note: if you’re on a free tier, you may not need to make this change.